When you first create a Microsoft 365 group in Outlook, is it Private by default. This means only approved members in your organization can see what's inside the group. Anyone else in your organization who isn't approved can't see what's in the group. However, you can choose to make the group Public so others in your organization can see inside it.
See Learn more about Microsoft 365 Groups for details about Microsoft 365 groups in Outlook.
-
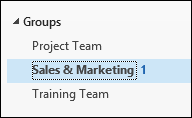
In the left side navigation pane, under Groups, select your group.
-
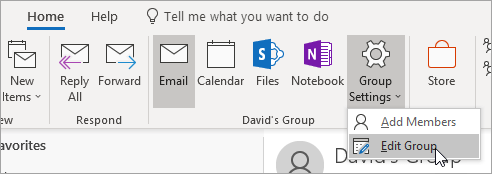
On the ribbon, select Home > Group Settings > Edit Group.
-
Under Privacy, choose Public or Private.
-
Select OK.
-
Open Outlook on the web.
-
In the navigation pane, under Groups, select your group.

-
At the top of the page, select

-
Under Privacy, choose Public or Private to match the setting you want.
-
Select Save to make your selection. It may take a few minutes for the changes to take effect.