Beginning with Office 2016, Word, Excel, and PowerPoint have a High fidelity image resolution option that allows you to insert a picture into a document with minimal compression for optimal rendering on high-resolution displays.
If you notice a loss in image quality or pixilation when inserting pictures, you may want to change the default resolution for your document to high fidelity. Choosing the high fidelity resolution ensures that pictures are not compressed unless they exceed the size of the document canvas, that minimal compression is applied if necessary, and that the original aspect ratio is maintained.
In PowerPoint 2016 and newer versions, the default image resolution is already set to high fidelity.
To change the default resolution to high fidelity in Word or Excel:
-
Click File > Options > Advanced.
-
Under Image Size and Quality, select High fidelity in the Default resolution list.

To change the default resolution to high fidelity in Word or Excel:
-
Click the app-name menu (Word or Excel) > Preferences. Then, under Authoring and Proofing Tools, select Edit.
-
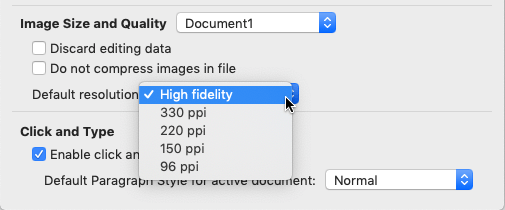
Under Image Size and Quality, in the Default resolution list, select High fidelity.