When you add a modern page to a site, you add and customize web parts, which are the building blocks of your page. This article focuses on the Markdown web part.
The Markdown web part allows you to add text to your page and format it using Markdown language.
Notes:
-
Some functionality is introduced gradually to organizations that have opted in to the Targeted Release program. This means that you may not yet see this feature or it may look different than what is described in the help articles.
-
The Markdown web part is not available in SharePoint Server 2019.
Add the Markdown web part
-
Go to the page where you want to add the Markdown web part.
-
If your page is not already in edit mode, click Edit at the top right of the page. Find the Toolbox (

-
Select See all web parts, then select or drag-an-drop Markdown from the list of web parts.
-
Start entering your markdown code. Click Edit properties (

-
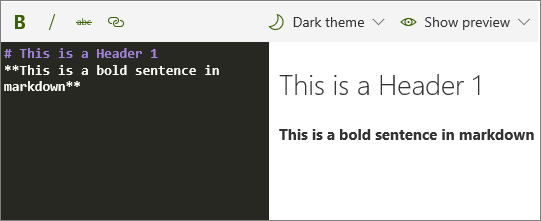
On the toolbar, you can:
-
Use the bold, italic, and strikethrough buttons to quickly format text. For more types of formatting, enter the appropriate markdown syntax.
-
Use the link button to create links to other pages.
-
Select a light or dark theme for the code window.
-
Show or hide a preview.
-
-
When you're ready, click Publish at the top right of your page.
For more information on markdown utilized by this web part, see the Marked.js documentation.